How to Sew on Ribbing Without Ripples
If you've ever finished a lovely top only to spot little ripples in the neckband, you'll know how frustrating that is. That's exactly what this guide is about: sewing on ribbing without ripples isn't rocket science, but it depends on a few details that all need to work together. It's not just about the seam. The fabric, the cutting, the stretch and your machine settings all play their part.
Why ribbing ripples
Ripples hardly ever have just one cause. Usually several things come together. The ribbing was stretched a little too much, the neckline or hem stretched out while you were sewing, or the machine pushed the fabric along instead of feeding it evenly.
With jersey, French terry or fine cotton knits in particular, any unevenness shows straight away. That's annoying, but also reassuring: once you know the cause, you can improve the result a great deal. So it's not that you "can't sew properly" – it's often simply down to the materials and technique.
Sewing on ribbing without ripples – the essentials
Before you sew the first seam, it's worth taking a quick look at your materials. Good ribbing has plenty of recovery. It should stretch, but spring back into shape afterwards. If the fabric is too floppy or already stretched out, even careful sewing will only get you so far.
The ratio between the length of the ribbing and the edge is just as important. Ribbing needs to be shorter than the edge it's sewn to, otherwise it won't sit nicely. But if it's too short, it pulls the edge in and can cause ripples too. How much shorter the ribbing should be depends on the material. Fine rib behaves differently from tubular ribbing with elastane, and a neckline often needs a different measurement from a sleeve cuff.
A good rule of thumb is to shorten the ribbing cautiously at first and try it out on a test piece. It takes a few minutes, but saves a lot of unpicking.
Cutting matters more than you might think
Neat work starts at the cutting stage. The ribbing should be cut correctly along the grain, or rather the direction of the knit. If it's cut off-grain, it's more likely to twist or pull unevenly.
The width plays a role too. Very narrow ribbing is less forgiving of inaccuracies than slightly wider ribbing. For beginners, medium widths are often easier because they're simpler to guide and small irregularities are less noticeable.
Getting ready to sew
It's best to sew the ribbing into a loop first and then divide it into quarters. Do the same with the neckline, sleeve or hem. These markings help enormously because they spread the stretch evenly. If you just sew "by feel", you'll often stretch too much in one place and too little in another.
If you're using clips or pins, place them exactly at the quarter points. You can mark more finely in between if needed, especially with slippery or very stretchy fabrics. This isn't an unnecessary extra step – it's one of the simplest ways to get a neat result.
It's also important that the fabric edge itself hasn't already stretched out. A neckline that's been left lying around for a while or handled a lot during cutting may already have lost some of its tension. In that case it can help to stabilise it beforehand with a light line of stitching or some stay tape – especially with very soft fabrics.
How to sew on ribbing without distorting the fabric
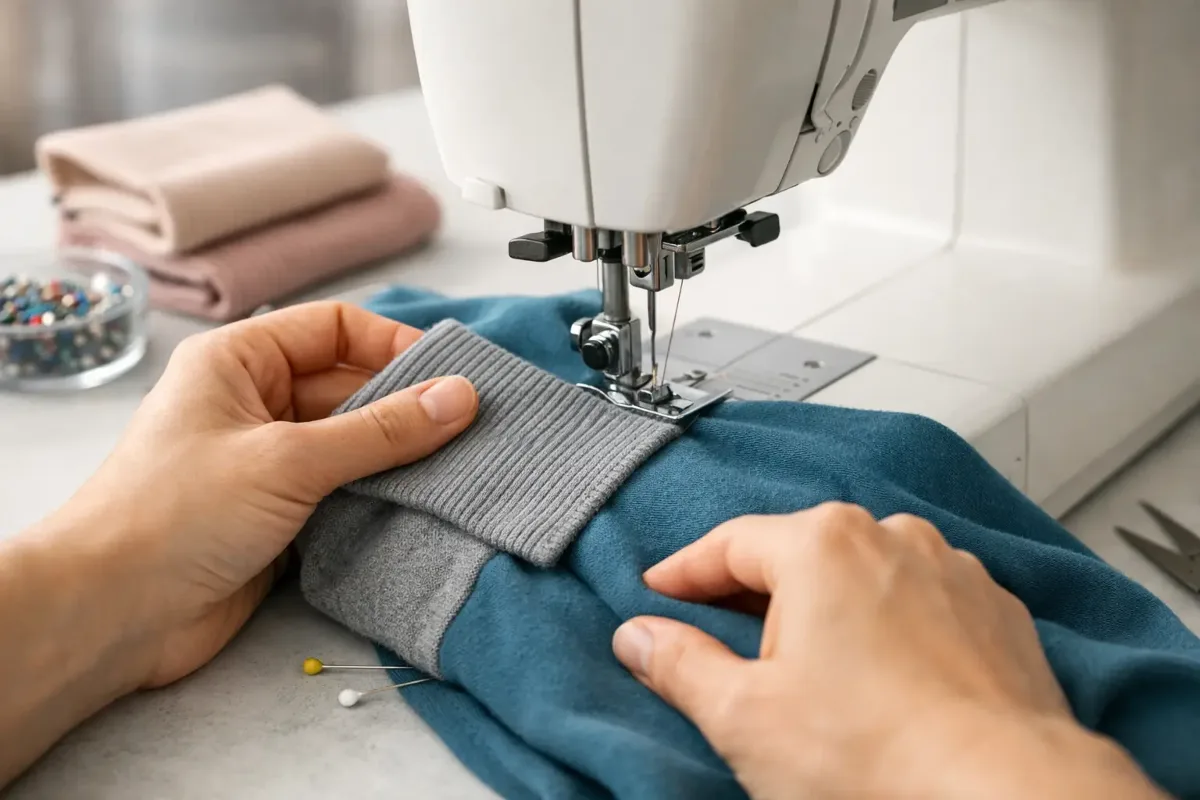
The key point when sewing is simple: stretch only the ribbing, not the main fabric. Keep the neckline or hem flat, but don't put any extra tension on it. This is exactly where a lot of ripples come from – both layers being pulled at the same time.
Sew slowly and steadily. Between two markings, stretch the ribbing just enough for it to fit the edge exactly. Often only a little tension is needed. If you pull hard, you'll quickly end up with too much length in the seam.
An overlocker usually makes this easy, but you can get a really lovely result on a sewing machine too. What matters is less the machine itself than how it's set up. A stretch stitch, the right presser foot pressure and a suitable needle make all the difference.
Which stitch should you use?
On an overlocker, the classic 4-thread stitch is often the most straightforward choice for ribbing. It sews, finishes the edge and stays stretchy. Even so, rippling can still happen if the differential feed isn't right. With fine or very stretchy fabrics in particular, it's worth setting it a little higher so the fabric doesn't get stretched out.
On a regular sewing machine, a narrow zigzag, an elastic stitch or a stretch straight stitch all work well. Which stitch looks best depends on your machine and your fabric. So a test piece isn't overcautious – to be honest, it's almost always the best shortcut.
Settings that are often overlooked
If you want to sew on ribbing without ripples, don't just look at the stitch – make sure you check the presser foot pressure too. If it's too high, the fabric gets stretched as you sew and puckers afterwards. Many domestic machines come set fairly firm from the factory, which can be fine for woven fabric but causes problems with jersey.
The needle should suit the fabric as well. For jersey and ribbing, jersey or stretch needles are usually the better choice because they push the knit loops aside rather than damaging them. A blunt or unsuitable needle doesn't just cause skipped stitches; it can make the whole seam look uneven.
Then there's speed. Sewing fast sounds practical, but with ribbing it's often a direct route to unevenly distributed stretch. Here, sewing more slowly usually means sewing more neatly.
Common mistakes – and what really helps
One very common mistake is ribbing that's too short. It sits snugly, but pulls the edge in so much that ripples or bulges form. On the other hand, ribbing that's too long sits limply and quickly looks unfinished. So there's no single magic percentage for every project. The material has a say too.
Pressing is often underestimated as well. Freshly sewn ribbing can sometimes look more uneven straight after sewing than it really is once it's been gently steamed. Please don't flatten it – shape it with steam and light pressure. With neckbands especially, this often works wonders.
If the seam still ripples despite good preparation, check three things in turn: was the ribbing shortened correctly, was only the ribbing stretched, and did the machine perhaps feed the fabric too strongly? The solution usually lies right there.
Differences between necklines, cuffs and hems
Not all ribbing behaves the same. A neckband should lie flat and often has to do more shaping work. Here, the exact length is particularly important. Just a few millimetres can make a big visual difference.
Sleeve cuffs are often less fussy, especially on children's clothes or hoodies. They can sit a little more snugly without it being a problem. On the other hand, the fabric there is often thicker, which means more bulk when sewing and so a little more care.
At the hem, a lot depends on the sewing pattern. Straight hems are usually easier to attach ribbing to. Curved or very stretchy edges need more of a feel for it so nothing gets distorted. Sometimes a classic hem really is the better choice than ribbing. So it depends on the project, not just the technique.
Still practising? Test on a sample first
Especially when a fabric is new to you, it's worth using a scrap. Test the ribbing length, the stitch and the presser foot pressure on it. It sounds like more work, but it saves nerves and fabric on the actual garment.
At Die Stoffkönigin we see it time and again: if you choose fabric and ribbing that go well together, you're already halfway there. Ribbing that holds its shape, has good recovery and the right weight for the main fabric makes a great result so much easier.
What if your ribbing has already rippled?
Not every ripple means you have to unpick everything. Slight unevenness sometimes disappears after pressing or after the first wear, once the seam settles. But if the ribbing is visibly overstretched or the neckline stands away from the body, there's usually no getting around fixing it.
Then it's worth taking an honest look rather than getting annoyed. If the ribbing was too short, cut a new piece with a little more length. If the problem was the machine, change the settings first and then sew it again. Simply trying again with the same technique rarely leads to a different result.
Neatly sewn ribbing isn't a matter of luck. It comes from the right materials, evenly distributed stretch and a machine that supports the fabric rather than pulling it out of shape. If you take a few extra minutes over it, the finished piece won't just look better – it'll usually feel nicer to wear, too.