Making your own iron-on appliqué made easy
A small fabric motif can quickly turn a stain on a child's jumper, a plain tote bag or a home-sewn top into a firm favourite. Making your own iron-on appliqué is a lovely way to do it: you don't need an embroidery machine, and you can transform fabric scraps into animals, stars, vehicles or completely freeform shapes. With the right fusible web, the motif stays put without making the project complicated.
Why iron-on appliqué is so handy
With a homemade iron-on appliqué, a fabric motif is fixed to a base fabric using double-sided fusible web. You can cut the motif from woven fabric, jersey, sweatshirt fabric or many other materials. Small scraps are ideal – the ones that are too small for a whole sewing project but far too pretty to throw away.
The big advantage: you decide on the colour, size and shape yourself. On children's trousers, an iron-on knee patch can cover up a tear. On a cushion cover, a floral motif adds a personal touch. And on bags or fabric storage baskets, names, letters and simple symbols work particularly well.
For many decorative projects, this technique works perfectly without any sewing at all. For clothes that are worn and washed often, though, an extra line of stitching around the edge is the more durable choice. A narrow zigzag stitch protects the raw edge and gives the appliqué a neat, well-finished look at the same time.
Making your own iron-on appliqué: what you'll need
A great result doesn't depend on having lots of equipment, but on the right combination of fabric, fusible web and heat. Before you start, get the following ready:
- fabric scraps for the motif – ideally tightly woven cotton or jersey that isn't too thin
- double-sided fusible web for appliqué
- the fabric or finished garment to use as the base
- a pair of sharp fabric scissors, plus embroidery scissors for small shapes if needed
- an iron and a thin cotton cloth to use as a pressing cloth
- if you like, a sewing machine, matching thread and a fine needle
Check the manufacturer's instructions for your fusible web. Temperature, pressing time and whether to use steam can all vary. Coated fabrics, softshell, raincoat fabric and very delicate synthetics in particular often don't cope well with high heat. It's always worth doing a test on a scrap first.
Which fabrics work well for the motif?
Woven cotton is especially beginner-friendly: it does fray a little at the cut edge, but it cuts cleanly and presses flat. Jersey looks lovely and soft on T-shirts, leggings and children's clothes. Because it stretches, take care not to pull it out of shape when cutting. A fine, stable fusible web gives it extra support.
On sweatshirt fabric, fleece or coarse fabrics, the motif can be a bit larger so that small details don't get lost. Very thick layers of fabric, on the other hand, can make the bond uneven. For delicate motifs, smooth, fairly thin cotton fabrics are usually the better choice.
Your fabric motif, step by step
First, draw your motif on the paper side of the fusible web. Remember: for letters, numbers or figures facing a particular direction, you need to draw the motif as a mirror image. For a star, a circle or a leaf, it doesn't matter.
Roughly cut the fusible web out around your drawing. Place the adhesive side on the wrong side – the side that will be the back – of your motif fabric. Iron it on according to the manufacturer's instructions, usually with gentle pressure and without sliding the iron across the fabric. Sliding can distort small motifs or spread glue where it doesn't belong.
Let the fabric cool briefly. Then cut the motif out exactly along the drawn line. The cleaner the edge is now, the better the appliqué will look later. On tight curves, it helps to guide the scissors in small, steady snips rather than trying to cut large arcs in one go.
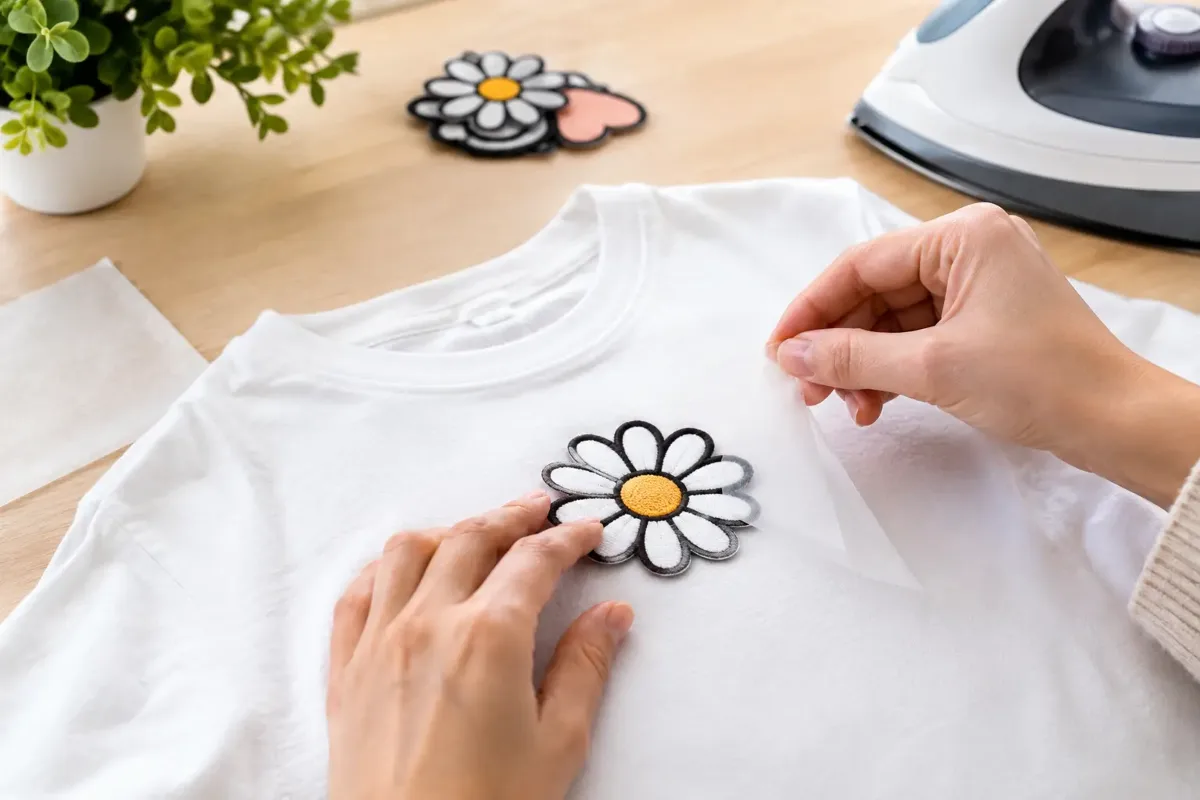
Now carefully peel off the backing paper. Underneath is the second layer of adhesive. Place the motif where you want it on the garment or sewing project. Check the position once more before ironing – especially for centred motifs and lettering.
Cover the motif with a thin cotton cloth and press it firmly with the iron. If the appliqué is quite large, work in sections. Afterwards, let the piece cool down completely before you pull on it, fold it or carry on sewing.
Iron first, then sew
If you'd like to stitch the appliqué down, again wait until everything is cold. A narrow zigzag stitch is the tried-and-tested classic. Set the stitch width on a test piece first: too wide can look busy on small motifs, while too narrow won't reliably cover the edge.
On jersey and other stretchy base fabrics, a three-step zigzag is a good alternative, as it moves better with the fabric. Sew slowly, especially around curves. Don't pull the fabric taut, or you'll easily end up with ripples around the motif.
Not every appliqué needs a visible stitched outline. On decorative cushions, wall hangings or bags that are rarely washed, the iron-only version may be just right. For hard-wearing knee patches, nursery clothes or backpacks that get a lot of use, stitching is definitely recommended.
Common problems and simple solutions
If a corner lifts after cooling, either the temperature was too low, the pressing time too short or the base fabric not quite suitable. Lay a pressing cloth over it and iron the spot again according to the instructions. On some fabrics, a water-repellent finish prevents the adhesive from bonding permanently.
Ripples around the motif often appear on jersey or thin sweatshirt fabric. A lightweight interfacing on the back of the base fabric can stabilise it before you apply the motif – especially helpful for large designs. On a finished T-shirt, though, bear in mind that extra layers of interfacing can make that area less stretchy.
Fraying edges are normal on cotton if they aren't stitched down. If you like a handmade, slightly relaxed look, you can use this on purpose. If you want the appliqué to stay neat for a long time, a zigzag or dense satin stitch is the better choice.
Care also affects how long it lasts. It's best to wash the finished item inside out and follow the care instructions for the most delicate material you've used. A very hot tumble dryer can put more strain on the adhesive bond than a gentle wash.
Ideas for quick appliqué projects
To begin with, simple shapes are the most rewarding: circles, hearts, clouds, stars or simple animal faces come together quickly. A scrap of patterned cotton becomes an eye-catching heart on a plain T-shirt. Plain fabrics, meanwhile, are wonderful for letters on drawstring gym bags or name cushions.
On children's clothes, motifs can have a practical job too. A large patch on the knee of a pair of trousers can be designed as a bear's face, a rainbow or a digger. That way, the repair doesn't look like a makeshift fix but like a new favourite detail. For bags, flowers, houses, fruit, initials or small label-like shapes look lovely.
If you're combining several fabrics, make sure there's enough contrast with the base. A dark motif on dark sweatshirt fabric quickly disappears, even if the fabric itself is gorgeous. Lay the fabrics side by side in daylight before ironing – this often helps more than choosing on screen.
An iron-on appliqué doesn't have to be perfectly symmetrical to bring joy. Especially with handmade pieces, it's fine to see that they were made with care and your own ideas. Start with a small motif on a scrap – you'll soon discover which fabrics, colours and shapes suit your projects.