Sewing a Zip into a Bag Made Easy
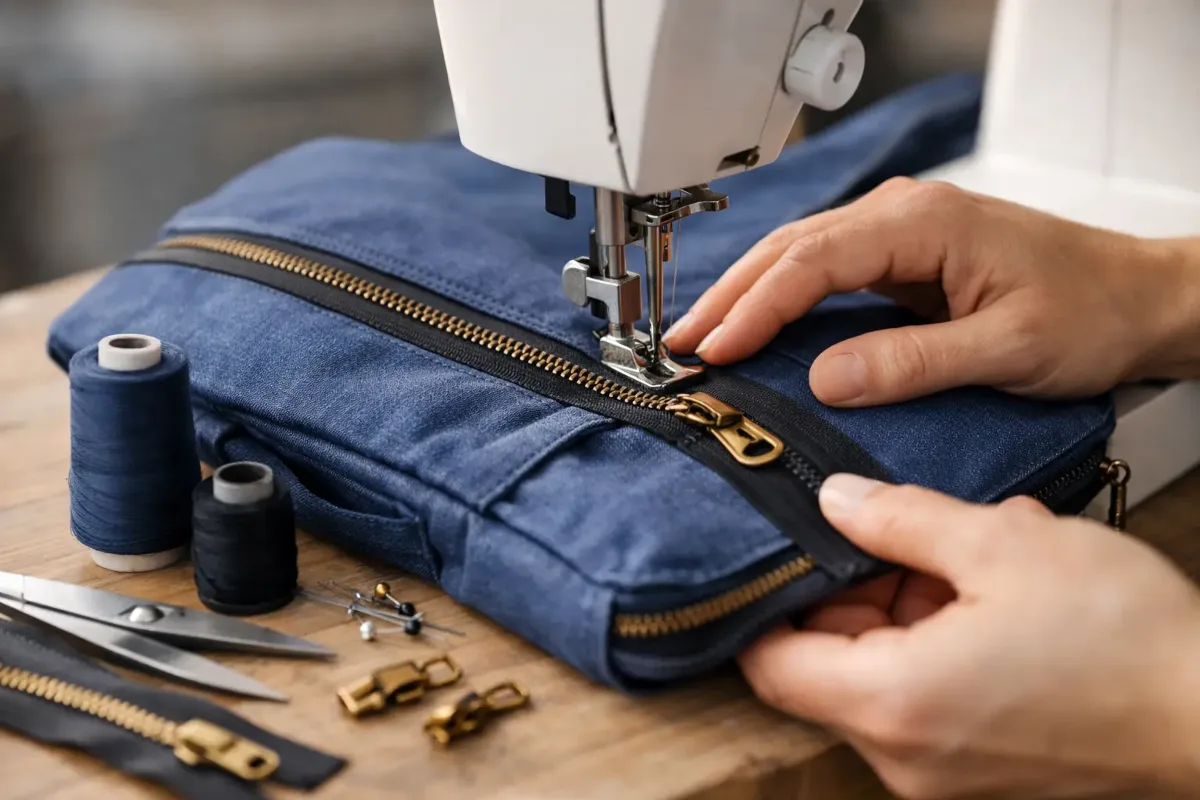
An open bag compartment is quick to sew, but it often isn't very practical in everyday life: keys, phones and loose change can all too easily find their way out. Sewing a zip into a bag might sound tricky at first. With careful preparation, the right zip foot and a few markings, though, it becomes a step that even beginners can master with confidence.
Which zip is right for your bag?
Before the sewing machine comes out, your choice of zip decides how comfortable the bag is to use and how good the result looks. For make-up bags, small pouches and lined fabric bags, closed-end zips are the right choice. They stay closed at one end and can be shortened to the length you need. Open-ended (separating) zips, on the other hand, are mainly needed for jackets or waistcoats, not for classic bags.
A plastic coil zip is pleasantly straightforward for many bag projects. It's flexible, easy to sew and available in lots of colours. If the bag needs to be especially hard-wearing, such as a tool bag or a roomy shopping bag, a sturdy plastic or metal zip can be a good idea. Metal teeth look striking but need a little more care when sewing: the needle must never hit a tooth.
As for length: the zip should be at least as long as the planned opening, ideally a few centimetres longer. A zip that's too long can simply be shortened after sewing, whereas one that's too short noticeably restricts access to the inside of the bag. For a small inner pocket, 15 to 20 cm is often enough; for a make-up bag or handbag, 25 to 35 cm is usually more practical.
What you need to sew a zip into a bag
Besides your outer fabric, lining and zip, a few small tools make the job much easier:
- zip foot for your sewing machine
- matching sewing thread, ideally in the colour of the fabric or zip
- fabric clips or fine pins
- sewing gauge or ruler and a marking pen
- iron for crisp fabric edges
- if needed, small pliers and zip stops for shortening
A zip foot is especially helpful because it stitches close to the teeth without bumping into them. Before you start, check which side of the foot the needle needs to run on. On many machines you can also move the needle position to the left or right. A test piece made from the same fabric layers will save you frustration later.
The easy method: zip between outer fabric and lining
This method is ideal for lined bags, make-up bags and small pouches. The zip sits neatly between the outer fabric and the lining, the seam allowances disappear inside and the edges get a tidy finish.
1. Prepare and mark the fabric pieces
Cut out the outer fabric and lining according to your sewing pattern. If the outer fabric is very soft, a light to medium interfacing is worthwhile. It gives the edge of the bag structure and stops the fabric from rippling along the zip. With canvas, faux leather or already firm home décor fabrics, extra interfacing isn't always necessary. It depends on the shape you want your bag to have.
Mark the centre on both top edges. Mark the centre of the zip as well. These little reference points make a huge difference in making sure the zip doesn't end up crooked, or with more fabric sticking out on one side.
2. Pin the first side of the zip
Lay the outer fabric in front of you, right side up. Place the closed zip on top, right side down, so the teeth face the outer fabric. Then lay the lining over it, right side down. The fabrics are now right sides together with the zip sandwiched between them.
Line up all the top edges and secure them with clips or pins. Fabric clips are especially handy for thick fabrics, faux leather or coated materials, as they don't leave holes. Make sure the zip pull isn't right where you're about to stitch; slide it roughly to the middle of the zip.
Sew slowly along the top edge with a straight stitch. A distance of about 5 to 7 mm from the teeth works well for most zips. Just before you reach the zip pull, stop with the needle down, lift the presser foot and carefully slide the pull behind the foot. Then carry on sewing. This keeps your seam straight.
3. Turn, press and edgestitch
Fold the outer fabric and lining away from each other so that their wrong sides are together. Carefully press the edge flat. For synthetic, coated fabrics or faux leather, please use a low temperature and a pressing cloth if needed.
Now topstitch the edge from the right side, close to the zip. This seam doesn't just look neat; it keeps the lining away from the teeth so it doesn't get caught when you open the zip. Use matching thread for a subtle look. On sporty bags or canvas bags, contrasting thread can be a deliberate design feature.
4. Sew the second side the same way
For the second side, place the remaining open top edge of the outer fabric right sides together with the free edge of the zip. The lining goes on top, again right sides together. Be sure to check beforehand that the outer fabric and lining aren't twisted. Once the zip is closed, both outer fabric sides must be visible on the outside and the lining sides on the inside.
Sew the second edge as before, turn the fabric pieces and edgestitch again. Now open the zip at least halfway. This step is often forgotten but is crucial: only with the zip open can you turn the bag right side out easily later on.
Closing the bag without the lining shifting
Now place the outer fabric pieces right sides together and the lining pieces right sides together too. The zip sits in the middle. Several layers meet at the ends, so it helps to fold the zip's seam allowances towards the lining. This reduces bulk at the transitions.
Carefully pin or clip the sides and bottom edge. Sew all the way round, but leave a turning gap of about 8 to 10 cm in the bottom edge of the lining. Sew slowly over the ends of the zip and secure the seam with a few backstitches. That's exactly where the most strain will be when the zip is opened and closed.
For a bag with a base or boxed corners, shape these only after sewing the sides. For a simple flat base, pull the bottom corner into a point so that the side seam and bottom seam lie on top of each other. Sew straight across. The wider this seam, the deeper the base of the bag. This works the same way for both the outer fabric and the lining.
Turn the bag right side out through the gap in the lining. Gently push out the corners and edges with a blunt stick or a point turner. Please don't use scissors, as they can poke through the fabric. Finally, close the turning gap by edgestitching on the machine or by hand with a ladder stitch.
Common problems and practical solutions
If the fabric edge ripples along the zip, there was often too much pull on the fabric or the upper thread tension was too tight. Sew more slowly, guide the fabric only lightly and test the thread tension on a scrap. With lightweight cotton or viscose, interfacing along the zip edge can also make a big difference.
If the zip pull catches the lining, the edgestitching is usually missing or too far from the teeth. An extra line of topstitching will sort this out. If the zip is too long at the end, only shorten it once the bag is finished. On coil zips, secure the new end point with a few tight zigzag stitches, then cut off the excess. Metal zips, by contrast, need a suitable zip stop or pliers to remove individual teeth.
With very thick bag fabrics, your machine may struggle at the ends of the zip. A hump jumper, a folded piece of fabric behind the presser foot or slowly turning the handwheel will help you over the bulky spot. If necessary, don't shorten the stitch length too much: around 2.5 to 3 mm gives a durable, neat seam.
A zip doesn't have to be invisible to look good. A colour-coordinated zip pull, crisp topstitching and carefully pressed edges turn a handmade bag into something you'll love reaching for every day.