Hoodie sewing patterns for your favourite hoodie

A hoodie quickly becomes a favourite – as long as the pattern, fabric and ribbing really go together. With the right hoodie sewing pattern you can sew a comfy one-off for yourself, your child or as a personal gift. It isn’t just the design on the pattern sheet that matters: ease of movement, the drape of the fabric and a carefully sewn hood make all the difference between a hoodie that gets worn all the time and one that stays in the wardrobe.
What makes a good hoodie sewing pattern
A hoodie sewing pattern usually consists of a front and back, sleeves, a hood and facings or ribbing pieces. Depending on the style, there may also be a kangaroo pocket, a high collar, a zip or a panelled front. For beginners, a straightforward design with detailed instructions is often the best choice. It helps if the steps for the hood, the ribbing and the hemming are clearly explained.
Also check which types of fabric the pattern was designed for. A close-fitting style in stretchy jersey sits differently from a relaxed oversized hoodie in sweatshirt fabric. That’s why the stretch requirement is no minor detail. If you use a fabric that is noticeably less stretchy than intended, the hoodie may end up too tight across the shoulders, at the neck or at the cuffs.
The sizing is worth a second look, too. Standard sizes vary from one sewing pattern to the next. It’s better to measure your bust and hips – and for children’s sizes, chest measurement and height as well. Compare the figures with the size chart rather than simply going by the size you usually buy. With hoodies in particular, it’s fine to factor in comfort: if you want to wear a T-shirt or a thin jumper underneath, a little extra ease makes sense.
Hoodie with a hood, collar or zip?
The classic hood keeps your neck warm, looks sporty and leaves room for drawstrings or a pretty lining. For young children, hoodies without drawstrings are usually the more practical choice. A sewn-on collar is quicker to make and less bulky – a good alternative for anyone who finds hoods annoying when sitting down or under a jacket.
A zip-up hoodie is versatile for everyday wear but calls for a bit more precision. The zip has to match the length of the front and be inserted neatly. An open-ended zip works for a jacket version, while a short zip at the neckline gives you a sporty quarter-zip look. If you’re sewing a hoodie for the first time, you’ll often find a pull-over style more relaxing to start with.
Choosing the right fabric for your hoodie sewing pattern
Sweatshirt fabric is the classic choice for hoodies. French terry, also known as summer sweat or loopback, has the typical loops on the reverse and is pleasantly lightweight. It works well for hoodies for spring, the in-between seasons and active children. Brushed sweatshirt fabric is warmer and feels soft on the inside – ideal for autumn and winter.
Jersey is lighter and usually very stretchy. It suits slimmer hoodies, lightweight casual tops or styles meant to be worn under a jacket. In a loose-fitting design, however, jersey can look less structured than sweatshirt fabric. Fleece is particularly warm and soft, but it needs to suit the pattern: a voluminous hood or thick seams can quickly become bulky with very fluffy fleece.
For the cuffs and hem you’ll usually need ribbing with good recovery. It keeps the sleeves and hem in shape. Some sewing patterns cut the ribbing pieces from the main fabric, others require dedicated ribbing. Both work, but the measurements aren’t always interchangeable. Ribbing is usually stretchier and is therefore cut shorter than the edge it’s sewn to.
When working out how much fabric you need, it pays to check the fabric width and the print. Large motifs, wide stripes or directional prints often need a little more fabric so that the front, sleeves and hood can be lined up nicely. At Die Stoffkönigin you can order fabric by the metre from just 20 cm – handy when you only need a small extra piece for pocket bags, a hood lining or splashes of colour.
Plain, printed or mixed fabrics
A plain hoodie shows off the design lines beautifully, for example raglan sleeves, panels or a large hood. Printed sweatshirt fabric, on the other hand, forgives small irregularities and instantly brings a simple style to life. With large motifs, check before cutting where they will end up. An animal face right on the side seam or lettering upside down is easy to avoid if you lay out the pattern pieces first.
Combining fabrics is a lovely way to use up leftovers. For example, pair a calm plain fabric with a print for the hood lining, sleeves or kangaroo pocket. What matters is that the fabrics are of similar weight and similar stretch. A very thin jersey next to thick brushed sweatshirt fabric can cause seams to twist or one piece to hang differently from the other.
Before cutting: the small steps that save a lot of hassle
Wash your fabric before sewing in the same way you plan to wash the finished hoodie. Many fabrics shrink a little in the first wash. That way your garment keeps its intended fit after washing. Then press the fabric smooth, provided the material can take it.
Transfer all the markings from the sewing pattern carefully. Notches, balance marks, pocket positions and the centre front will help you later when sewing everything together. Snip the notches just a few millimetres deep so they don’t cut into the seam allowance. If you’re working with a paper pattern, trace off the size you need rather than cutting the original sheet. That way the other sizes stay intact.
Seam allowance is a common stumbling block. Some sewing patterns already include it, while with others you need to add it when cutting out. Be sure to check this in the instructions. If the seam allowance is missing and you don’t notice, the hoodie will be too small all round. If it’s added twice, it will be too loose and the hood may not sit neatly.
Sewing a hoodie: what order works best?
First sew any pockets, panels or appliqués onto the individual pattern pieces while they’re still lying flat in front of you. A kangaroo pocket is far easier to position neatly now than on the finished hoodie. Then, depending on the pattern, sew the shoulder or raglan seams and set in the sleeves or join them to the raglan pieces.
Next, you’ll usually sew the side and sleeve seams in one go. Sew slowly over the underarm junction, as several layers of fabric meet there. The hood is sewn together, lined if required, and then pinned evenly to the neckline. Marks at the centre front and centre back are a real help here.
Finally, it’s time for the ribbing and hem. Divide both the ribbing and the fabric edge into quarters, mark these points and pin them together. When sewing, stretch the ribbing but avoid stretching the hoodie itself as far as possible. This distributes the fullness evenly so the finished edge sits nicely.
Overlocker or regular sewing machine?
With an overlocker you can sew stretch fabrics quickly and finish the edges at the same time. It’s handy, but not essential. On a regular sewing machine, a narrow zigzag stitch, a stretch stitch or a triple straight stitch all work well. Test the setting on a scrap of fabric first. The seam should stretch with the fabric without the thread snapping or the fabric going wavy.
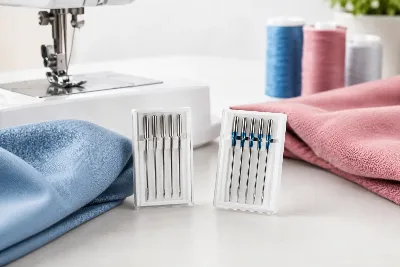
For hems and topstitching, a twin needle is a lovely option. It creates two parallel lines of stitching on the right side and stays stretchy thanks to the bobbin thread. With jersey and French terry in particular, it gives the hem a neat, professional look. Use suitable jersey or stretch needles so you don’t end up with tiny holes in the fabric.
Easy fixes for common fit problems
If the neckline pulls forward or the hood sticks out, it’s often down to unevenly stretched fabric edges or a hood that wasn’t distributed properly. Re-pin the quarter points, tack if necessary and sew the area again slowly. With very thick sweatshirt fabric, a less bulky hood lining can be a good idea.
If the sleeves are too long, a wider cuff is often the simpler solution than recutting the whole sleeve. If it’s too tight at the hips, choose one size up for your next hoodie and adjust at the shoulders or sleeves if needed. For children, a little extra length in the sleeves and body is often welcome – especially for handmade favourites that can happily fit for another season.
A hoodie doesn’t have to look factory-perfect to be a success. Clean fabric, a suitable sewing pattern and a few careful steps turn fabric by the metre into a garment with personality. Take your time over your first hoodie, keep your notes on sizing and fabric choice, and use them for the next one – and before long, one pattern will become your very own favourite.