How to Sew Neat Buttonholes – A Guide in 7 Steps
However carefully a lovely garment has been sewn, a frayed, too-tight or crooked buttonhole stands out instantly. With this guide to sewing neat buttonholes, fastenings on blouses, shirts, waistcoats, children's clothing or cushion covers become far less stressful. It's not just about the sewing machine: preparing your fabric, choosing the right interfacing and sewing a test piece make the biggest difference.
Sewing neat buttonholes: preparation is everything
Before the sewing machine comes into play, the position of your buttonholes should be settled. Mark the centre of each buttonhole with a fine disappearing-ink marker, tailor's chalk or tacking thread. On a button placket, it helps to fix the top and bottom buttons first and then space the rest evenly in between. That way the fastening will sit straight later on and won't pull askew.
The length of the buttonhole depends on the button. Measure its diameter and add about 2 to 3 millimetres for flat buttons. Thick buttons, such as fabric-covered or shank buttons, need a little more room. The buttonhole should close easily but mustn't be so loose that the button slips out when you move.
With vertical buttonholes, the strain from opening and closing is usually distributed better. They work well for blouses, shirts and button plackets. Horizontal buttonholes are often the better choice on the waistbands of skirts or trousers, because they can give a little widthways under strain. Which option suits best therefore depends on the sewing pattern, the button position and how much stress the fastening will take.
Choosing the right fabric and interfacing
Buttonholes often sit in a spot that has to withstand a lot. Even a firm woven fabric is weakened by the cut. That's why, for most garments, a suitable iron-on interfacing belongs on the wrong side of the button placket, waistband or facing. It stabilises the fabric, prevents rippling and ensures the satin stitches lie evenly.
For lightweight cotton, viscose or poplin, a fine, lightweight interfacing is ideal. For canvas, denim or coating fabrics it can be a little sturdier, but it shouldn't make the fabric unnecessarily stiff. For jersey and other stretchy fabrics you'll need a stretch interfacing. Without it, the buttonhole easily distorts, even if the machine stitches perfectly.
Always test interfacing and fabric together on a scrap. Iron on the interfacing according to the manufacturer's instructions, let the piece cool completely and then sew a test buttonhole. With very thin, slippery or loosely woven fabrics in particular, a tear-away embroidery stabiliser placed underneath the fabric can also help. It supports the fabric while you sew and is carefully removed afterwards.
Have these ready for your preparation:
- the original fabric with the same interfacing as in your project
- the chosen button and a tape measure or sewing gauge
- matching good-quality sewing thread
- a buttonhole foot, a seam ripper and ideally a pin
Setting up your sewing machine – and testing first
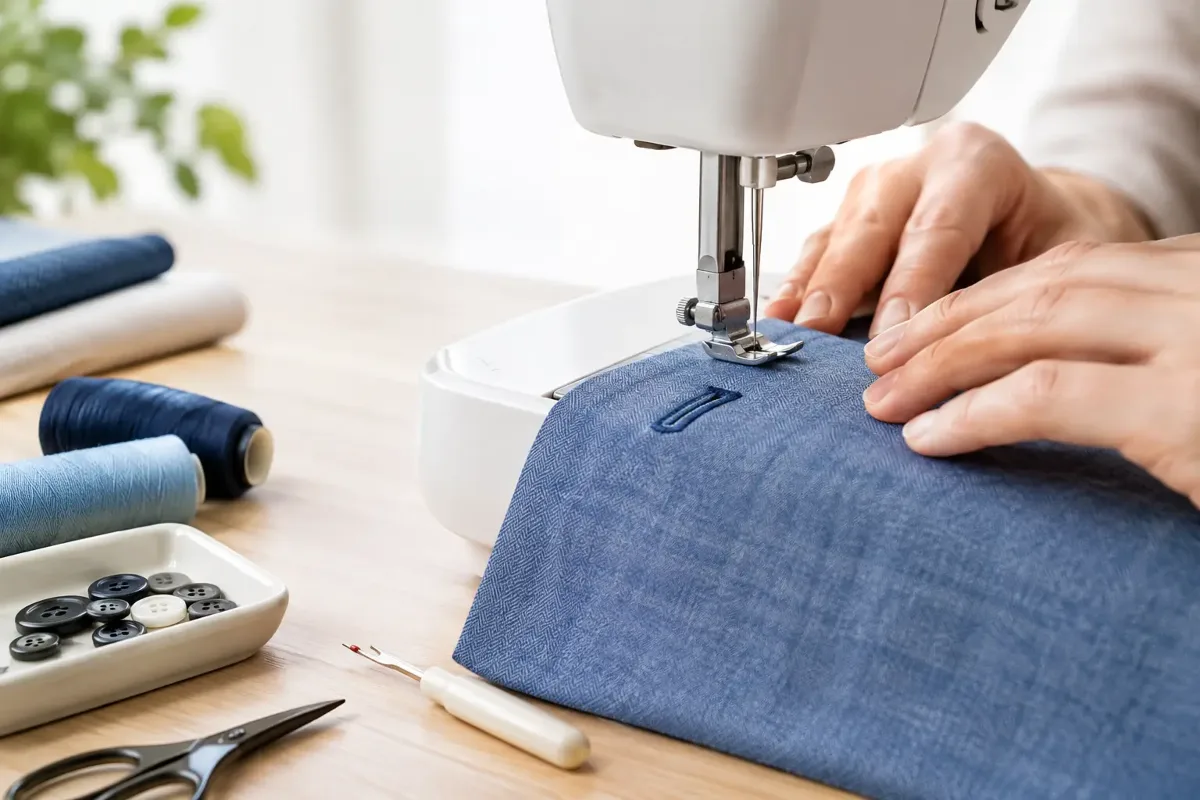
Most domestic sewing machines have an automatic buttonhole programme. You place the button in a holder on the buttonhole foot, and the machine uses it to work out the length and sews both rows of satin stitch and the bar tacks in one go. That's convenient and especially practical when you need several identical buttonholes.
Even so, check before you start that the buttonhole lever on the machine is pulled down correctly. Otherwise, many models won't recognise the automatic sequence properly. Attach the buttonhole foot straight and line up the mark on the foot exactly with the centre you've drawn.
Stitch density has a big influence on the result. Satin stitches that are too loose look patchy and fray more quickly. Stitches that are too dense can pucker the fabric, especially with fine cotton or jersey. A medium to fairly dense setting is usually a good starting point. If needed, adjust the upper thread tension slightly if loops appear on the back or the fabric starts to pucker.
Your choice of thread makes a difference too. Ordinary all-purpose thread is right for most projects. Very thick thread can jam in a standard buttonhole programme, while very fine thread can easily look too inconspicuous on heavy fabric. On a coat or jacket, a slightly heavier thread can look lovely, but here too the test piece has the final say.
Sewing buttonholes: step by step
1. Start on a scrap
Take a fabric scrap made up exactly like your project: same fabric, same interfacing, ideally the same number of layers. Sew at least one complete buttonhole and cut it open. Only once the button passes through nicely and the satin stitches look even should you move on to the garment itself.
2. Place the fabric straight under the foot
Lay the fabric flat under the buttonhole foot without stretching or pushing it. On a button placket, the marked line must run parallel to the edge. Before sewing, double-check that the opening is facing the right way. A vertical buttonhole on a horizontal waistband edge doesn't just look odd – it may not work as well either.
3. Watch the first stitches
Start slowly. The machine first sews one row of satin stitch, then a bar tack, the second row and finally the opposite bar tack. With an automatic programme, you shouldn't pull the fabric. If you force it through, the length can change or the buttonhole can end up crooked.
On a machine with a four-step buttonhole programme, you sew the individual sections one after another. Count the stitches on the first side or go by a mark so that both rows end up the same length. This method takes a little practice, but with patience it gives lovely results too.
4. Secure the threads and check
After sewing, pull the thread ends through to the back if possible and knot them there, especially with fine fabrics or button plackets that take a lot of strain. Don't cut the threads right next to the satin stitches. Leaving a short tail keeps them more secure and stops the stitching coming undone at the start.
5. Cut the buttonhole open safely
This is where a lot of mishaps happen. Place a pin crossways just in front of each bar tack. If the seam ripper slips too far, the pin stops it before the bar tack is damaged. Cut carefully from the centre towards one end and then towards the other. For very small buttonholes, a pair of pointed embroidery scissors is often easier to control.
Don't cut into the dense bar tacks. They hold the satin stitches together and give the buttonhole its shape. Then check with the original button that the opening is big enough. If it's still too tight, enlarge it only in tiny steps.
When the buttonhole doesn't turn out neatly
If the fabric puckers, it usually lacks stability or the stitch density is too high. Iron-on interfacing, embroidery stabiliser or a slightly lower stitch density will often solve the problem. With jersey, a walking foot can also help if the fabric layers shift against each other.
If the rows of satin stitch are different lengths, it's often down to uneven fabric feed or the piece being pulled while sewing. Sew a new test piece, hold the fabric only lightly and let the machine do the work. With a manual four-step buttonhole, make sure you use the same number of stitches on both sides.
If the cut edges fray badly after opening, the satin stitch is too loose, the thread is unsuitable or the fabric is very loosely woven. In that case, a firmer interfacing and slightly denser stitches make sense. With particularly delicate fabrics, a small piece of organza or fine embroidery stabiliser on the back can add extra security.
If the button will barely go through, don't enlarge the whole buttonhole straight away. First open the slit just a fraction further. With thick buttons, it pays to make the buttonhole deliberately a little longer on the test piece. That saves frustration later on the finished blouse or jacket.
Buttonholes for special projects
On children's clothing, buttonholes often take more strain, because little hands can pull hard. Good interfacing and a buttonhole that isn't made too small pay off here. For bodysuits, tops or light little jackets made of jersey, press studs are often a more practical alternative. But if you want a classic button fastening, stabilise the area carefully.
On bags, cushions and home décor projects, the buttonhole can be a visible part of the design. Contrasting thread can look striking, but it calls for especially precise marking, because small irregularities stand out more. With thick layers of canvas or denim, it helps to press the seam allowances open well around the buttonhole and to work with a suitable needle that isn't too fine.
For blouses and dresses in viscose or other drapey fabrics, the opposite applies: work slowly, stabilise sparingly but reliably, and test the settings on a scrap. That way the fabric keeps its soft drape without the buttonhole stretching out of shape.
A neatly sewn buttonhole isn't down to luck – it's the result of testing, stabilising and patient cutting. Take those few extra minutes, especially for the first buttonhole of a project – after that, you'll often carry on sewing with much more confidence.